How to share a RINO wallet
A step to step guide for creating shared wallets.
In this article, we will show you, step by step, how you can share a Monero wallet with multiple users within your organization. You can give these users different roles, resulting in different permissions, allowing you (the owner) to tightly control access to your wallet.
If you are keen to know more about all the different roles that exist in RINO, what they can do and what they can’t do, you should take a look at our previous post.
In this article, we will address the use case of sharing a wallet with your accountant. Should he/she be able to create transactions? Or just view the wallet activity?
For those 2 scenarios, and a few more, RINO provides you the tools to do what you need without getting in the way. So let's explore them. The rest of the article assumes you already created a RINO wallet.
#1 Create a share request
The first thing you should be aware of is that RINO requires consent from both parties due to privacy and security reasons, so sharing a RINO wallet always requires multiple steps.
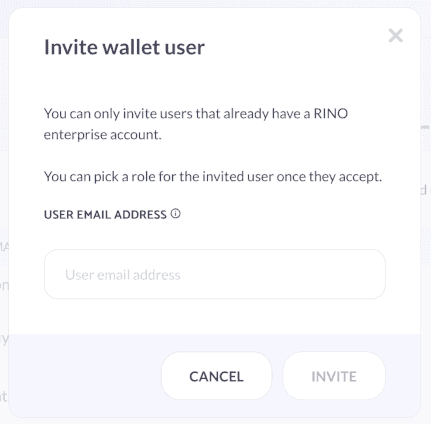
So the initial step is to make a share request. You will provide the email of the user you want to grant access to, and RINO will take care of notifying them. A few details will be shared to help with their decision, such as your email and the respective wallet’s name.
RINO’s notification will only be sent if the other party has an account and if both accounts are of the same type. This means enterprise users can only share wallets with other enterprise users, and users of the community version with other user’s of the community version.
#2 Accepting the request
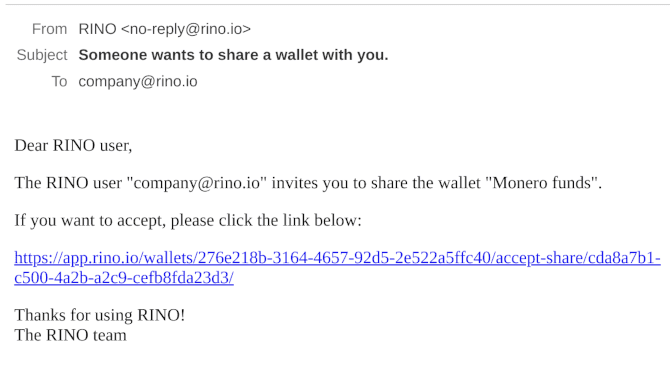
Now you will have to wait for the other user to accept your request. They will receive an email with your details and be prompted to accept by clicking on the included link.
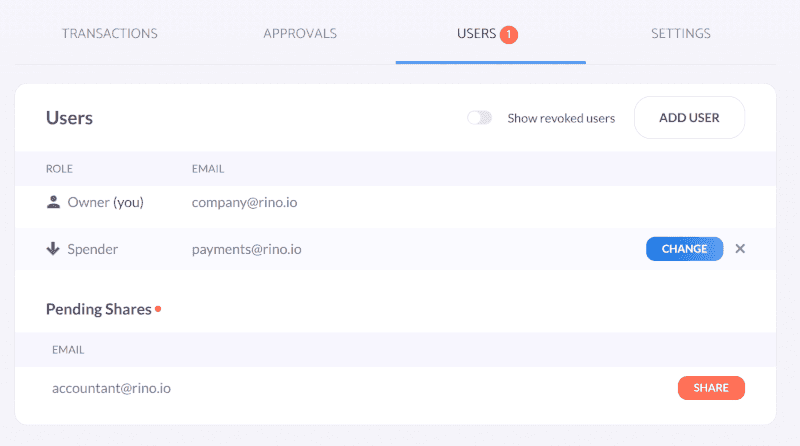
If the other party accepts, you will be notified to proceed to the next and final step.
#3 Creating a new membership
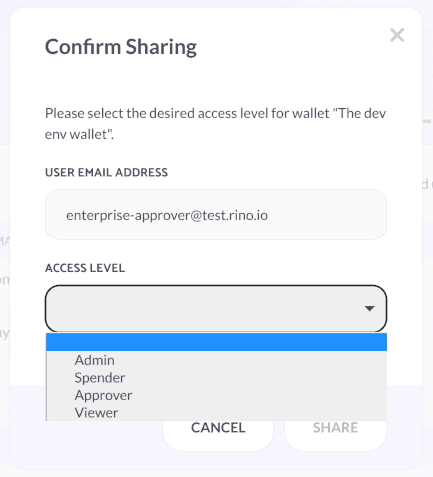
Now you have everything you need to finally create the new wallet membership. The big question is what role, or permissions, should the new user have.
For our accountant use case, following the principle of the least privilege, we don’t want to give Admin access (which would grant him full control of the wallet). With this in mind, RINO provides you with 3 other options:
Let’s analyze them one by one:
#3.1 View-only
With this role, the accountant will only be able to view the wallet activity and export the information they need (in CSV or XLS formats). This is a practical solution for external accountants that do not have a say in operations.
#3.2 Approver
In other scenarios, before the funds are spent, an authorization from a third party is required. If your organization relies on the green light of your accountant to move any funds and pay for expenses, the “approver” access level is the best choice. The accountant won’t be able to move funds, but will be able to approve pending transfers created by other wallet users. RINO will only proceed with sending the funds after it gathered all the required approvals.
#3.3 Spender
Finally, if the accountant has more responsibilities and usually takes care of payments, the “spender” access-level is the right choice. The accountant will be able to create new transactions and send funds, but they won’t be able to change your wallet’s settings. This means their usage is still dependent on the limits you’ve set and the number of approvals the wallet requires.
Conclusion
Within organizations, the management of funds requires tools that allow multiple people to work in parallel and independently. These tools must also allow your organization to implement industry best practices when managing funds. For example, it’s essential to have granular controls over what each of the users can and cannot do.
And that’s precisely what RINO allows your organization to do, in a simple and straightforward way. One important aspect that should be mentioned, is that the features described above are exclusive to our enterprise offering, so when signing up, make sure you are choosing the correct account type.
RINO’s goal is to provide the maturing Monero ecosystem the tools it needs to expand and thrive, bringing to all users an easy and convenient experience, while maintaining all of its security properties.


