Automate payments using RINO's SDK
In this article, we give you a quick walkthrough about how to integrate Monero in your business using RINO. Managing Monero infrastructure requires technical expertise, constant maintenance and can be costly, just like many other cryptocurrencies. RINO takes care of all of that for you, while you keep complete control over your funds.
Introduction
RINO offers enterprise-grade Monero wallets that support business processes such as spending policies and approvals. You can easily integrate Monero into any service by using RINO’s SDK. This enables you to focus on what you are good at instead of fiddling with obscure daemons and blockchain protocols. For example, you can easily send and receive Monero transactions, as well as control spending of funds through approvals via human operators.
In this article we show you how to use RINO’s SDK to programmatically interact with a RINO wallet.
What is the SDK?
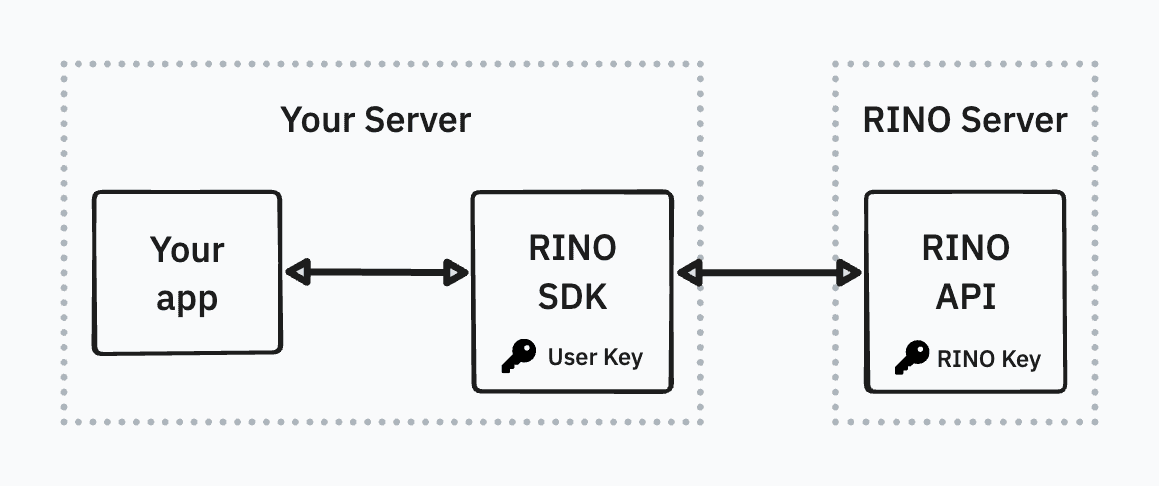
Essentially, the RINO SDK is a software component that you can download and run on your server. It comes as a Docker image. The resulting container exposes an easy-to-use REST API, so your apps can interact with your wallet locally. This way, sensitive information never leaves your infrastructure and all the important operations, such as decrypting and using Monero private keys, are done on machines that you own and trust.
Below, you can find a simple illustration of the whole setup:
With this setup, RINO's servers provide all the necessary network and wallet information to the SDK, so it can then expose it to your app. In the case of transferring funds, the SDK signs the transaction locally and only then sends it to RINO for it to be co-signed before it can be published onto the network.
Requirements to run the SDK
The first thing you need to run the SDK is a RINO enterprise account. Don't be intimidated by the name, these accounts are currently free to create and use. You also need the ability to run Docker containers on your server. While it is possible to run the SDK using other mechanisms (the code is freely available by the way), the RINO team only provides support for the container image due to standardization and isolation reasons.
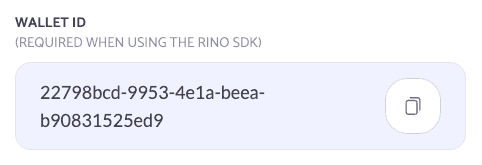
Finally, you need to generate an API key in your RINO account, get your wallet’s ID and enable SDK access to the wallet, so you can correctly configure the SDK. The account password is also required by the SDK.
How to generate an API Key
You can find the API Key management panel in your account settings. Remember to properly label your keys and set expiration times that fit your security needs.
Once created, you won't have access to the key anymore. So copy the value to a secure place before closing the dialog.
API Keys are tied to user accounts and not to specific wallets. RINO recommends that you create separate accounts for regular wallet usage and for programmatic access. This way, by sharing a wallet, you will be able to restrict the permissions of your API key, just like you would do to any other user.
Configure your wallet
Next, you need to configure your wallet to support SDK access. Navigate to your wallet’s settings page:
On the settings page, enable SDK access:
Finally, copy ID of your wallet. You’ll need it in the next step.
Running the Container
Now that I have everything set, let's run the container. For testing purposes, we can quickly do it using the following command:
$ docker run
  -e RINO_ENV=test
  -e RINO_API_KEY=api_a0dxxxxxxxxxxxxxx
  -e RINO_ACCOUNT_PASSWORD=xxxxxxxx
  -e RINO_WALLET_ID=xxx49056-71ac-4fb5-8a83-6fd00c8xxxxx
  --rm
  -d
  -p 127.0.0.1:3000:3000 rinowallet/sdk:latest
Or by including it in a docker-compose.yml together with your application:
version: '3.4'
services:
  payments-app:
    ...
    environment:
      RINO_SDK_URL: http://rino-sdk:3000
    depends_on:
      - rino-sdk
  rino-sdk:
    image: rinowallet/sdk:latest
    environment:
      RINO_ENV=test # change to 'prod' for mainnet
      RINO_API_KEY=api_a0dxxxxxxxxxxxxxx
      RINO_ACCOUNT_PASSWORD=xxxxxxxx
      RINO_WALLET_ID=xxx49056-71ac-4fb5-8a83-6fd00c8xxxxx
    ports:
      - 127.0.0.1:3000:3000  # remove to avoid exposure to host
Please ensure that any file that contains your API key or account password is properly secured and is not committed to version control.
API Functionality
Overview
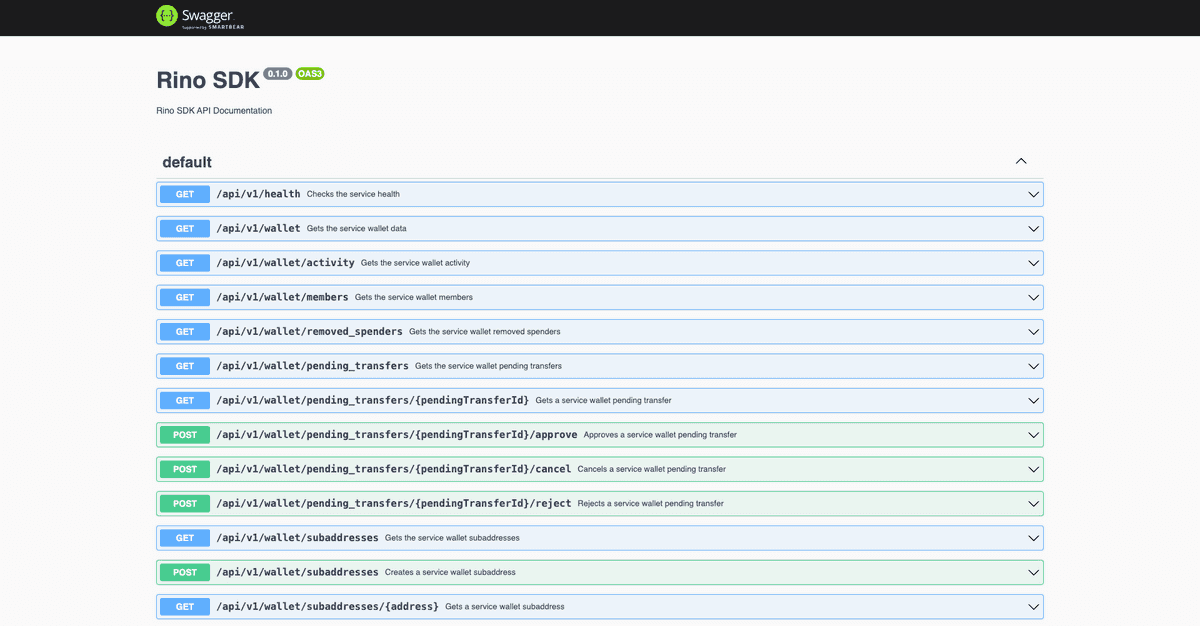
Once the container has been successfully started, you can access the API
documentation of the container locally via http://localhost:3000/docs:
This web interface even allows you to play with the API directly. This way, you can easily explore the API and see how it works.
Inspecting the wallet state
As an example, let's build a small python script that uses the SDK to interact with the wallet. It should check the wallet state and print the most recent transaction. If this transaction is an incoming transfer, the script will also report the label of the sub-address that was used for that transaction.
Let’s start with printing the wallet state and balance:
# Python Example
from urllib.request import Request, urlopen
import json
import os

RINO_SDK_URL = os.environ.get("RINO_SDK_URL")

wallet_req = Request(
    url=f"{RINO_SDK_URL}/api/v1/wallet",
    headers={"Accept": "application/json"},
    method="GET"
)

with urlopen(wallet_req) as resp:
    wallet_info = json.load(resp.read())

print("The current wallet is:", wallet_info["name"])

# The amount is provided in picoXMR
print("The usable balance is:", int(wallet_info["unlocked_balance"]) / 10**12)
In this example we use urllib so that no extra dependencies are required.
However, you're free to use packages that make your code easier to write and
read, such as the requests or aiohttp packages.
In the above snippet, we simply fetch the most recent wallet information and then display the balance in a human friendly format.
Now let’s look at the latest transaction:
# Python Example
tx_req = Request(
    url=f"{RINO_SDK_URL}/api/v1/wallet/transactions",
    headers={"Accept": "application/json"},
    method="GET"
)
with urlopen(tx_req) as resp:
    txs = json.loads(resp.read())

last_tx = txs[1]
print("The most recent transaction is:", last_tx["id"])
Similarly to the above snippet, we fetch the list of recent transactions and display the ID of the last one.
# Python Example
if last_tx["direction"] == "in":
    address = last_tx["destinations"][0]["address"]
    sub_addr_req = Request(
        url=f"{RINO_SDK_URL}/api/v1/wallet/subaddresses/",
        headers={"Accept": "application/json"},
        method="GET"
    )
    with urlopen(sub_addr_req) as resp:
        addresses = json.loads(resp.read())

    addr_info = [addr for addr in addresses if addr["address"] == address][0]

    print("An incoming transfer received on the sub-address labelled:", addr_info["label"])
Using the same approach, using the receiving address present in the transaction object, we fetch the information of this receiving sub-address in order to extract the label.
Finally, the output of the above script should be something like:
The current wallet is: SDK wallet
The usable balance is: 9.39988226
The most recent transaction is: 1b963daeb27a0ebce6d0e8b6190d1bb61a311856e988253ebdf1a576e5afa47c
An incoming transfer received on the sub-address labelled: Donations
Sending a new transaction
Now that we already have the SDK running and already have a good idea about how to interact with the provided API, let's explore how easy it is to send payments.
RINO provides two ways for sending funds:
- The simple
/sendendpoint. Which will execute the whole process in one go. - The multistep process, where you first create a partially signed transaction
with the
/transactions/createendpoint, that can later be sent to the network using the/transactions/submitendpoint.
There is no better or recommended approach, it will depend on your needs and your workflows. The main difference between the two is that with the latter you can inspect the transaction yourself (to check for fees for example) and hold it back for a while before actually sending the funds.
For our demo, we will use the simple method:
# Python Example
payment_data = json.dumps({
    "destination": {
        "address": "73a4nWuvkYoYoksGurDjKZQcZkmaxLaKbbeiKzHnMmqKivrCzq5Q2JtJG1UZNZFqLPbQ3MiXCk2Q5bdwdUNSr7X9QrPubkn",
        "amount": "50000000000"
    }
}).encode()

payment_req = Request(
    url=f"{RINO_SDK_URL}/api/v1/wallet/send/",
  headers={
    "Content-Type": "application/json",
        "Accept": "application/json"
    },
    data=payment_data,
    method="POST"
)
with urlopen(payment_req) as resp:
    response_data = json.loads(resp.read())

print(response_data)
We just need to provide the destination address and the amount (using picoXMR), then do a POST request to /send. The SDK will take care of all the actions required to open the wallet, update the existing outputs and key images, build the transaction, sign the transaction with your user key and then send the transaction to RINO's server to be co-signed and published to the Monero network.
The request is expected to take up to 20 seconds to complete. You will get a response like this:
# JSON Example
{
  "requiresApproval": false,
  "result": [
    {
      "created_at": "2023-09-27T13:03:37.010Z",
      "updated_at": "2023-09-27T13:03:39.897Z",
      "wallet_id": "fb064b24-e455-4cc7-bf15-ba96f320cc26",
      "txid": "658fc556f7a219141da228d1850d649553ba2e96cf33d1a15e4f48ac7d910d19",
      "amount": "50000000000",
      "timestamp": null,
      "direction": "out",
      "fee": "117660000",
      "confirmations": 0,
      "created_on_platform": true,
      "tx_to_self": false,
      "memo": "",
      "order_id": "",
      "ip_addr": "XXX.XXX.XXX.XXX",
      "euro_amount": null,
      "destinations": [
        {
          "index": 0,
          "address": "73a4nWuvkYoYoksGurDjKZQcZkmaxLaKbbeiKzHnMmqKivrCzq5Q2JtJG1UZNZFqLPbQ3MiXCk2Q5bdwdUNSr7X9QrPubkn",
          "amount": "50000000000"
        }
      ]
    }
  ]
}
Approvals
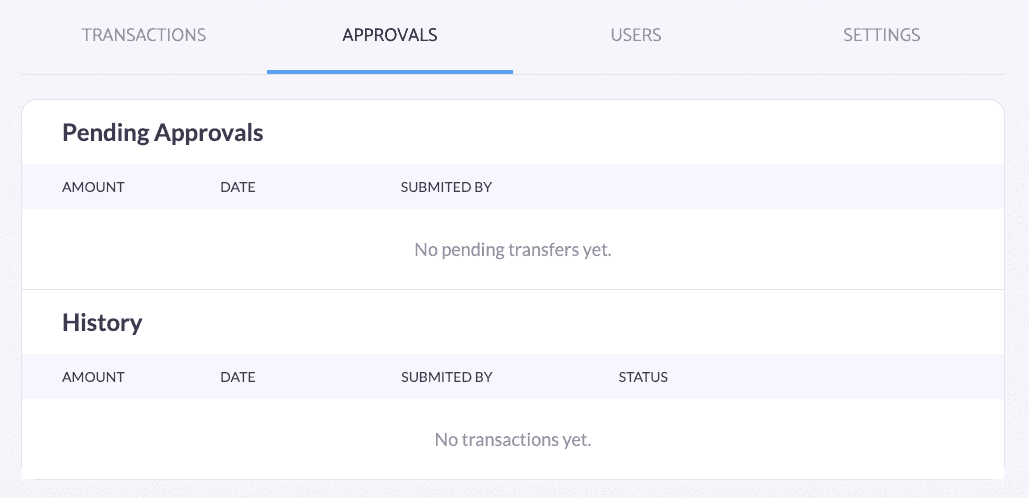
One small aside that you should be aware of, is that even if you use the SDK API to automatically send payments, the wallet is still subject to the policies and limits set by its administrators. This means that your transactions might be rejected because they go over those limits, and can also be held back by RINO until they meet the minimum number of approvals.
For this reason, you should double-check that your wallet settings are correct for the expected usage.
What’s next?
While the SDK is already 100% usable and useful for many use-cases, it is still a beta version. We are working on new features and improvements to give you more power and flexibility, handling your Monero wallet programmatically.
Remember that to test the SDK and your integration you don't need to use real Monero. RINO provides a test environment that lets you use the stagenet network without risking your assets. You can get stagenet Monero from our faucet.
We hope to get feedback from you, so we can keep continuously improving our tools and services.
Using RINO shouldn't be any harder or miss any features that you would expect from other traditional payment providers, with the difference that with RINO only you hold and control your Monero funds.


